Saturday, February 27, 2010

Beef and Guinness Stew

Our schedules have been a little off this week, so this is really the first night since Tuesday that I've fixed something worth posting on the blog. So, tonight was Beef and Guinness Stew, another recipe pulled from Cooking Light. (Not sure what's "light" about Guinness in a stew, but whatever.)


If your first reaction to this recipe is, "Yeah, I don't like Guinness" (or as my father would say, "That shit tastes like motor oil"), don't worry. Obviously, the alcohol is going to simmer/boil out during cooking time, and what remains is a really rich broth. I really, really wouldn't recommend omitting the Guinness.

I didn't really adjust anything in this recipe--I did choose not to add parsnips, because I'm not a fan of parsnips at all. I would recommend using the caraway seeds--it's just a teaspoon, but they add a lot of extra flavor to this. For even cooking of the beef, once you've cut the meat into the recommended cube size, let it sit out at room temperature for about 15 minutes. Otherwise, the meat will cook unevenly when you move to the next step, which is browning it at a high temperature. It's important to do this step in batches as instructed--adding all of the beef at once will drastically reduce the temperature of the oil/butter, resulting in subpar browning (it will actually just end up graying the meat, which is not a great thing to eat). Boil and simmer as instructed--it takes some time, but the end result is extremely tender beef and a rich, relatively thick broth.


I served this with a simple green salad and some crusty bread I picked up at the grocery store (specifically, a potato and rosemary bread).


Oh, and one important lesson learned from cooking this stew tonight: if the cook has a cold and can't taste anything, it works better if you have someone who can actually taste properly taste-test the broth. Otherwise, you may end up with a salty stew. Oops. (I still maintain that it tasted just fine to me, which probably isn't a good indicator since the leftover Guinness tasted like Bud Light to me.)

Tuesday, February 23, 2010

Artichoke-and-Red Pepper Pizza

As usual, I was craving pizza for dinner (there's rarely a day that goes by when I don't crave some kind of pizza/Italian food). Normally, that means a quick trip to the (too close) Amelia's, a local Italian restaurant that serves some amazing food. But I decided to try something different and a little healthier. I tend to revert to Cooking Light when I want to find something quick and healthy, and I landed on this Artichoke-and-Red Pepper Pizza. Incredibly easy, this pizza is surprisingly full of flavor (even without a tomato sauce base).


I went with the Pillsbury refrigerated crust, which is a little more than the suggested 10 oz. in the recipe but works just fine. I have yet to master any kind of dough, so this is a quick replacement if you don't have the time (or the patience) to make a pizza dough from scratch. I followed the recipe from there, making (as always) a few little changes. Instead of canned sliced mushrooms, I used fresh sliced mushrooms (I absolutely loathe the canned kind). I just added those to the dried basil, oregano, and julienned red peppers, adding about 1/4 tsp. salt.  I did use canned artichokes marinated in a brine; I just rinsed them to remove some of the salty brine and drained.

I also separated the garlic out from the initial saute time. This is one thing I keep stumbling upon: recipes that call for garlic way too early in the recipe. I've followed recipes that call for garlic sauteed with other vegetables, and inevitably, if you follow the time and the temperature as indicated in the recipe, you'll end up with crunchy little bits of garlic, which is one of the worst things you can throw into a meal. So, if I come across garlic in a recipe that requires any kind of saute time, I add it at the last minute and saute for about 2 minutes.

I just served this pizza with a garden salad topped with carrots, tomatoes and red onions. Simple, tasty and a great alternative to the usual takeout pizza.

Steak with Cajun Frites

Normally the husband takes care of the grilling, and every time I try, I'm reminded why he's in charge of grilling. Because I end up overcooking the meat 99 percent of the time on the grill, which always results in a little disappointment whenever I cut into it hoping for that perfectly pink center. Anyway, I tried this steak/fries combo recipe (minus the kale) from Cooking Light.


A few tweaks, though, as always:
-I cut down the cooking time/temperature on the fries/frites. Mainly because the thought of cranking our oven up to 500 degrees freaks me out. And I'm pretty sure the oven would freak out, too, considering it sets off the fire alarm in our house anytime I set it above 425 degrees. Any. Time.
-To prepare the fries/frites, I started with my baked fries base prep, then added the ingredients listed in the recipe (hot sauce, dried thyme, etc.).

Sides included a basic green salad topped with raspberries, chopped walnuts and bleu cheese crumbles, and baked beans.

Saturday, February 20, 2010

The Lady's Chicken Noodle Soup

My husband sometimes likes to welcome the first warmer winter day with a cold, so he was naturally craving some chicken noodle soup this evening. I could have just made a trip to the grocery store and picked up some canned soup, but if I have the time, I'm not about to take the easy way out. So, I did some recipe searching on Food Network's site and found a five-star rated recipe: Paula Deen's The Lady's Chicken Noodle Soup.


This was an easy soup, and far superior to the canned kind. I opted to "Paula Deen it up" by adding the heavy cream and Parmesan cheese, but it was just as tasty without. Adding the dairy, though, made a thick, almost stroganoff-like consistency. Don't expect a runny soup from this one.

A bonus to making this recipe was learning how to make a chicken stock relatively from scratch, something I've always been a bit intimidated to do up until now. The stock, however, was a cinch. I used two packages of split chicken breasts since I couldn't find any fryer chickens, halving each piece before adding to the soup pot.  I also added a bit more noodles and about twice the amount of mushrooms (because we're big mushroom fans).

I just served with a crusty multi-grain bread, and it was the perfect cold-weather meal.

Grilled Chicken with Rustic Mustard Cream

I pulled a Grilled Chicken with Rustic Mustard Cream recipe from the Cooking Light website, and it turned out to be a quick and flavorful meal. I made a few tweaks to the recipe, including the addition of more salt to the oil/rosemary mixture (which probably decreases the "light" part, but I find chicken horribly bland without proper seasoning). I used split chicken breasts for this recipe, which is essentially "bone-in" chicken--I just find bone-in to be much more flavorful. I removed the skin from the chicken with a paring knife and grilled until a golden brown (about 6-7 minutes per side); because split chicken breasts are thicker than boneless chicken breasts, I then popped the chicken into the oven on 375 degrees and finished baking (approximately 20 minutes). This type of food prep--searing on a high heat on a grill and then baking--can result in a juicier chicken because the quick sear helps lock in the juices from the start.


Another tweak to this recipe was adding a tablespoon of sour cream to the mustard cream--it just adds another depth of flavor.

Sides included egg noodles (one of my favorites--when I had my wisdom teeth cut out when I was young, my first request was cold egg noodles since I wasn't allowed hot food for a few days; I just fixed these according to the package directions, adding a bit more salt and a few tablespoons of butter) and roasted broccoli.


Roasting broccoli adds amazing flavor to regular broccoli, almost a nutty flavor, and it couldn't be easier. Just toss fresh (not frozen) broccoli florets (about 3 cups) with a few tablespoons of canola oil, salt and pepper, and spread out on a baking (cookie) sheet in a single layer. Roast for about 20 minutes in an oven preheated to 425 degrees, turning once halfway through roasting time. Roasting broccoli will turn the tips a golden brown, so don't worry if you sneak a peek and think you're burning the broccoli halfway through. When the broccoli is done, pull off the baking sheet and toss with olive oil and your choice of cheese and nuts (I've used parmesan and pecans for this, with some lemon zest, but we went with crumbled bleu cheese for this version; walnuts would have made a great addition if we had not finished those off earlier in the day).

L.A. Burger

We're fans of Bobby Flay and his food, so if we want a different take on a burger, I tend to go to his recipes first. This one, an L.A. Burger, is a fantastically fresh take on the regular burger. I omitted the watercress and opted for Cheddar cheese. The avocado relish is a must for this one--it adds a great depth of flavor to the meat and usual condiments. I can't really give any tips for cooking burgers--I'm still trying to master the skill myself and usually end up overcooking the meat (we prefer a pink center, or somewhere between medium/medium-rare). If I ever master grilling the perfect burger, I'll pass along some tips.


Sides included the ever-present-for-burgers baked fries and some baked beans.

Bourbon Baked Ham

I'm way behind on blogging, so there will be a few posts during the course of today. (Apologies for being so behind--anyone who knows me knows I have a tendency to get a bit obsessive when reading, so I've been more absorbed in my current reading, Drood. Book recommendation: if you like mysteries, or historical fiction, or a combination of the two, I highly recommend this book.) Anyway, my 'rents came up to visit last weekend, so we thought we would fix a dinner with a main dish that kind of prompted this blog in the first place. It's a Bourbon Baked Ham, another recipe from "Bon Appetit, Y'All" (a cookbook as well used in our house as any edition or cookbook of "Southern Living").


This really is a simple recipe that yields fantastic results:

Bourbon Baked Ham
1 Tbsp. canola oil
Half of a semi-boneless, ready-to-eat ham (5-6 lbs.), preferably shank end
1 c. honey (tupelo, orange blossom, or sweet clover)
1/2 c. sorghum, cane syrup, or molasses
1/2 c. bourbon (don't worry if you're not a fan of alcohol in food; my husband isn't either, but the alcohol bakes out and makes a great glaze for the ham, so I would not recommend skipping this ingredient)
1/4 c. freshly squeezed orange juice
2 Tbsp. Dijon mustard
-Preheat the oven to 350 degrees Fahrenheit. Brush the bottom of a large roasting pan with the canola oil.
-To prepare the ham, remove the skin and fat. Using a sharp knife, make 1/4-inch deep cuts in the meat in a diamond pattern (this will ensure the glaze gets absorbed into the ham, not just on the outside). Place the ham in the roasting pan. To make the glaze, heat the honey, sorghum (or cane syrup/molasses), bourbon, orange juice, and Dijon mustard in a saucepan over medium heat until just melted and combined.
-Pour the glaze over the prepared ham. Transfer to the oven and cook, basting every 30 minutes or so with the glaze on the bottom of the pan, for 2 to 2.5 hours, or until an instant-read thermometer inserted into the thickest portion of the ham registers 140 degrees Fahrenheit. If the ham starts to overbrown, loosely tent with aluminum foil to prevent it from burning.
-Remove from the oven to a rack. Tent the ham loosely with aluminum foil and let rest for 20 to 30 minutes to allow the juices to redistribute (do not skip this step--letting the meat rests ensures that the juices will be absorbed back into the ham, resulting in a juicy, not dry, slice of meat).
-Transfer to a cutting board, carve, and serve.


We served the ham with sides of creamed corn and toasted-pecan green beans (another two recipes from "Bon Appetit, Y'All") and toasted sourdough bread from a local bakery.


Creamed Corn
1 Tbsp. bacon fat or canola oil (to get bacon fat, saute four to six slices of bacon in a pan; you can crumble the leftover bacon over the green beans if you want to add more flavor to that, but canola oil works as well for this recipe)
Scraped kernels from 6 ears fresh sweet corn (we used thawed frozen corn because, obviously, fresh corn isn't in season yet; I think the fresh corn would have resulted in a better product because the moisture from the frozen corn kind of toughened up the kernels)
Coarse salt and freshly ground black pepper
4 Tbsp. unsalted butter
-In a large skillet, heat the bacon fat over medium heat until sizzling. Add the corn and season with salt and pepper. Cook until tender, about 15 minutes. Add the butter and stir to combine. Taste and adjust for seasoning with salt and pepper. Serve immediately.


Toasted-Pecan Green Beans
1.5 lbs. haricots verts or other thin green beans, trimmed
1/4 c. olive oil
1/2 c. chopped pecans
1 clove garlic, very finely chopped
1 Tbsp. chopped fresh basil
Coarse salt and freshly ground black pepper
-Prepare an ice-water bath by filling a large bowl with ice and water.
-Bring a large pot of salted water to a rolling boil over high heat. Add the beans and cook until crisp-tender, about 3 minutes. Drain well in a colander, then set the colander with beans in the ice-water bath (this is what is called "shocking," or quickly stopping the cooking process by submerging in iced water, which helps set the color of the beans and makes them crisp), making sure the beans are submerged.
-In the same pot, heat the olive oil over medium-low heat. Add the pecans and cook until toasted, about 5 minutes (a good rule of thumb to follow when toasting nuts is to notice when they become very fragrant; that is the point when they should be removed from heat). Add the garlic and basil; cook until fragrant, about 45 to 60 seconds.
-Drain the beans, shaking off the excess water, and return them to the pot. Toss to combine with the pecan mixture. Taste and adjust for seasoning with salt and pepper. Serve immediately.


For dessert, and as part of my Valentine's Day present, my husband (who knows I am not the biggest chocolate fan) came home with an orange/lemon cake from a local bakery. Amazing! I was even nice enough to share with the fam.

Monday, February 15, 2010

Lemon Tilapia

I'm behind again on posts--it's the snow. It causes sluggishness, apparently. So, a bourbon-baked ham post will soon follow this one. But this one is just easier to relay.

Because we ate some heavy food this weekend, I was ready for something a little light. I originally made a trip to the grocery store for a bag of mussels but ended up coming away with about 1.5 pounds of tilapia since mussels were unavailable (I'll have to make a mussels post next time they're in stock). The great thing about fish is that, if you choose something like tilapia, which is just a mild, white fish, you can buy a lot for a little and end up with a very full stomach. I've never been big on covering fish with a lot of spices, so I just sprinkled the tilapia with some salt and pepper, melted butter over medium heat in a cast iron skillet, and placed the tilapia in the skillet. Tilapia takes little time to cook--it should take about 3-4 minutes per side. You can tell the fish is done if the fish easily flakes with a fork. I sprinkled some minced garlic and lemon zest on the fish at the last minute to give a little more flavor and served with lemon wedges.


Sides included a crusty wheat bread and a salad of romaine lettuce, chopped pecans, thinly sliced red onion, bleu cheese crumbles, and a red wine vinaigrette


Our house over the weekend was chock-a-bock full of sweets, which is never a good thing. I don't have much of a sweet tooth, but because I was raised in the South, it's like an abomination if you don't finish EVERYTHING on your plate or within your sight. Oreos, homemade cookies from the husband's mom, and an amazing orange/lemon cake the husband ordered for me from a local bakery danced around us and tempted us for about 48 hours. So, tonight, our sweet tooth had to "settle" for some fruit. I found this quick little recipe for a Radiance Fruit Salad on Food Network's website. Because I am a HUGE fan of key lime pie (and anything citrus for that matter), the dressing for this hit the spot, almost like a liquid key lime pie. I thought the cantaloupe got lost against the lime-honey dressing and couldn't quite stand up to it. Our grocery store didn't have any kiwi in stock (probably because it's been in the 30s and snowing), but that would have worked well. I think, if you want to try this, your best bet is a mixture of berries. 


Okay, I lied about the ham post--we have very important things to do now. It's called the Westminster Kennel Club Dog Show. We're beagle owners--we may be a little biased. 

Wednesday, February 10, 2010

BBQ Chicken

Every once in a while, I remember how awesome a Crock Pot can really be. In the midst of a very blustery day (Speaking of blustery, anyone remember that Winnie the Pooh and the Hundred-Acre Forest Game for the old-school PCs where you would collect all of these objects, but if you landed in the Hundred-Acre Forest at the wrong time, everything would white-out and you'd lose all the objects you were collecting? Anyone? No? Just my sister and I? Okay, moving on...), I made a trek to the grocery store to pick up some chicken breasts--not the boneless kind, but the bone-in with skin. During lunch, I dropped in a Crock Pot the chicken and what was left of the homemade barbecue sauce from a weekend meal, seasoned the chicken with salt and pepper, covered, and let it go on high for about 5.5 hours. This resulted in, literally, fall-off-the-bone meat. I just served with some baked fries and leftover coleslaw, and voila.


Tuesday, February 9, 2010

Barbecue Dinner

This is going to be pretty lengthy, which explains why I've been putting it off for, oh, four days.
We were snowed in Friday, and having joined the mad rush of "Ohmygod, the world is ending! Grocery store! Grocery store!" (except our version involved not toilet paper and milk and bread, but a nine-pound cut of Boston butt and potatoes because that's how we roll), we were set (or I should say the husband) to smoke the pork for 10.5 hours (the husband is saying he should have let it smoke for 12 hours).

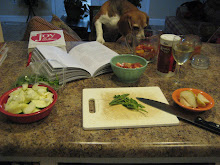
Sometimes we have sous chefs in the kitchen. And by sometimes, I mean all of the time.

The husband started out by mixing black pepper, cayenne pepper, and lemon juice and rubbing it into the pork (a sort of dry/wet rub).


He then brought to a simmer distilled white vinegar, orange juice, and water with any "citrus-y" fruit found lying around the house and sliced (i.e., apples, oranges, lemons, etc.) and let it cool.


Afterwards, he poured about a half a cup of the vinegar/citrus mixture over the pork. Reserving a cup or two of the vinegar mix for basting, he poured the remainder into the liquid reservoir of a "pre-heated" smoker and added water to the fill line (oops, I should mention that we have a smoker; if you don't, just get a smaller cut of Boston butt or pork shoulder, season as you like, and drop into a crockpot filled with homemade barbecue sauce, below, and let it go on high for about 8 hours). Setting the reservoir in the smoker, he put the grill over top, added the meat on the grill, and added some pre-soaked hickory chips over the lava rocks.


He let it cook on its own for three hours, then basted and added more hickory chips every hour after that for a total of seven hours. The ideal internal temperature for pork is around 165 degrees; however, the hotter you get the internal temperature, the easier it is to shred the pork. At 165 degrees, you'll be slicing the meat instead of shredding it.


While the husband was working on that, I prepped a few sides. First up was a homemade barbecue sauce. I'll admit that, if anyone were to see the page on which this recipe is found in the cookbook "Bon Appetit, Y'All," I would be thoroughly embarrassed. The page no longer requires a bookmark--it's actually naturally stiffened from the amount of ketchup, lemon juice, and all manner of ingredients I managed to spill on the page (hey, a sign of a good cook is messiness). The recipe makes about 6.5 cups of sauce, but you can halve it. Anyway, here's the so-called "Mama's Barbecue Sauce," and as the intro for the recipe claims, once you've "had homemade you will go off the store-bought kind for good."

1 cup (2 sticks) unsalted butter (I actually like to do a mix of regular butter and unsalted butter, 1 stick of each)
1 onion, preferably Vidalia, very finely chopped
2.5 c. ketchup
2 c. apple cider or distilled white vinegar
1/2 c. Worcestershire sauce
1/4 c. Dijon mustard
2 Tbsp. firmly packed brown sugar
Juice of 2 lemons
2 Tbsp. freshly ground black pepper
Coarse salt (kosher works well)
-In a saucepan, melt the butter over medium heat; add the onions and simmer until soft and melted, 5-7 minutes. Add the ketchup, vinegar, Worcestershire sauce, mustard, brown sugar, lemon juice, and pepper.
-Bring to a boil, decrease the heat to low, and simmer until flavors have smoothed and mellowed, at least 10 minutes and up to 30 minutes. (I usually let it simmer for about 45 minutes; I feel like I should warn you that the fumes that come off of this sauce are pretty strong, so if you decide to hang your head over the pot to get a whiff, you're going to burn a few nose hairs in the process, but I swear it's tasty.) Taste and adjust for seasoning with salt and pepper. Store in an airtight container in the refrigerator. It will last for months.

I normally set the sauce aside to cool, so it's pretty low maintenance. If you want to pop it into the fridge after it's done simmering, you can just reheat later on the stove.


Another make-ahead side to dinner was a Creamy Cole Slaw, a Bobby Flay recipe that nails one of my favorite childhood taste memories on the head. My grandmother makes the best cole slaw I've ever had, and I could never find the right recipe to replicate it, until I stumbled across this one. It's just a classic taste, and adds so much to barbecue. Now, I've tried to cheat this one by buying the pre-bagged cole slaw, and it just does not work. If you want to make this, I would suggest just toughing it out and shredding the cabbage and carrots by hand. Alternately, if you have a food processor with a slicing "wheel," you can knock out the shredding in no time. This is best if made a few hours ahead of time and left to chill in the refrigerator until ready to serve.


And lastly, fried pickles. If you've never tried fried pickles, you're missing out on a great appetizer. I think the first time I had fried pickles was on our honeymoon, at a great restaurant in Charleston, SC, called Virginia's on King. I've made them at home several times since then, but this one, I think, really tops them all. It's another Alton Brown recipe, and the coating/breading doesn't look like much initially, but if you are really patient and let them fry until a golden brown, the breading really holds up to the crunch of the pickle. I like to use Klausen whole dill pickles for this and serve with a Honey Mustard Dipping Sauce (or Ranch dressing in a pinch).

Shepherd's Pie

I never ate or tried to make Shepherd's Pie until I met my husband, who loves it. I couldn't remember the first recipe I tried, so I automatically reverted to Alton Brown for last night's dinner. (I do know that I tried a Rachael Ray recipe at one point, and, well, ick. Again. I'm not falling for it anymore, Rachael!)


Anyway, I omitted the corn from this recipe (I have an odd hatred of carrots, corn and peas mixed together--I'm not sure why, but I only like them in combinations of two, never the three together). It could have used a bit more salt, and I subbed out the lamb for ground chuck, which requires a little grease-draining to allow the meat sauce to thicken properly. This is a great, rustic main dish, especially perfect for snowy, wintry weather.

I served this with leftover "heavenly" cornbread and a simple tomato salad. The latter normally works best with heirloom tomatoes, which are impossible to find in a regular grocery store, so I just chose some red and yellow tomatoes, gave them a quick chop, and drizzled with olive oil, salt, pepper, some fresh thyme, and some thinly sliced red onions. If you have extra time, you can mix some olive oil and fresh herbs together and let it sit for an hour or so to infuse the oil with the herbs prior to drizzling over the tomatoes.

I swear, later tonight I will go over this past Friday's massive dinner, which consisted of a smoked pork, fried pickles (don't grimace if you haven't tried them--they're fantastic), homemade cole slaw, and homemade barbecue sauce.

Sunday, February 7, 2010

Super Sunday Supper

I'm still behind on a post of Friday's dinner, but that will have to wait until later this week, mainly because my husband was in charge of smoking a cut of pork that night, so he has the ingredients in his head. And that is difficult to extract right now since he's preoccupied with the Super Bowl.

So, I generally use Super Bowl Sunday as an excuse to make one of my favorite foods: chicken wings. In fact, it's kind of a nod to our first few months of dating, when the husband made chicken wings for our first Super Bowl together. Tonight, I went straight to one of my favorite culinary sources: Alton Brown. Though his recipes tend to be a bit more involved than others, they are worth it. Tonight's was relatively simple and absolutely perfect. Next time around, I will add more hot sauce (Texas Pete was the choice tonight), but the texture of these was amazing. Thanks to steaming the chicken wings beforehand and letting them dry out in the refrigerator before roasting, the result is an extra crispy skin and a moist, tender, meaty inside. Perfection. Just serve with some carrots/celery and your favorite wings dipping sauce.


The main dish was Shrimp and Grits, a recipe that is, to us, the penultimate shrimp and grits. For tonight, I upped the shrimp to 1.5 pounds and used extra mushrooms. This really requires no side dish--it's filling on its own. If you feel comfortable fixing the grits and the shrimp at the same time, it's worth it to do it that way. If you want to start and complete the grits first, just set the saucepan on low when you've finished that portion of the recipe.

Saturday, February 6, 2010

Southwestern Pork Soup

I've been way behind on posts because the snow has made me extremely lazy and extremely grumpy, and I feel like that episode of "Gilmore Girls" where Lorelai always had an affinity for snow until one year when it turns against her. And if you don't know what I'm talking about--really?! "Gilmore Girls" is a classic!

Anyway, I've become fond of trying out new soups/stews during these wintry days, so I chose a Cooking Light recipe, Southwestern Pork Soup. This really is a soup, not a stew, because it's of a thinner consistency, but it was quite tasty. Again, I added more salt because I'm a firm believer that any kind of meat should be seasoned properly and not just dumped into a pot without a lick of salt and pepper. Also, I used fresh ingredients, because the thought of using pre-chopped vegetables makes me want to bang my head against a wall. So, if you choose (wisely) to use freshly chopped vegetables, then the saute time will take a little longer, but not much. Oh, and ALSO....I've worked hard to properly season my Dutch oven, so there is no way I will even think about spraying it with cooking spray, thank you very much. A few drops of olive oil work just fine.

When I make this again, I may sear the pork pieces first before adding to the soup base and make it a little thicker by draining the tomatoes. I just served this with shredded cheese, sour cream, and Tabasco (of course). I also served it with pieces of heavenly cornbread drizzled with honey.


Pork has been the main dish of our snowed-in weekend. Last night's dinner was a smoked pork and various sides, so a separate post will go up soon...Until then, I'm going to sit here and seriously rethink my past wishes for snow:

Monday, February 1, 2010

Thai-Based Chicken

We've made this recipe so many times, it's a thousand wonders I have yet to memorize it as I have others. When we started dinner tonight, the husband reminded me that this is one of the first dinners we fixed while we were dating. The inspiration to learn how to make Thai-based food came from finally walking down the few steps from his apartment at that time to a local Thai restaurant below. Since then, we've come to rely more on this dinner when we crave Thai food.


This is relatively simple, and even easier if you have a wok in which to cook the chicken.

So, ingredients (keep in mind you can find most of these in the "ethnic" section of the grocery store):
2 c. jasmine rice
1 quart water
2 cans coconut milk
Red curry paste
1 lb. chicken, sliced into thin strips
1/4 sugar
3 Tbsp. fish sauce
1/2 red pepper, chopped
1/2 green pepper, chopped
1 medium yellow onion, chopped
1 can pineapple chunks, drained

In a large saucepan, bring the rice and water to boil; reduce the heat to low and simmer, covered, 25 minutes. You can leave the rice unattended--it requires no stirring or maintenance. If you finish the main dish after the 25 minutes are up, just pull the rice off heat and leave covered until ready to serve.

In a small bowl, whisk together one can of the coconut milk and the red curry paste, starting with 1 Tbsp. of the paste and increasing until you get the heat profile you want. Pour the milk/curry mixture into a wok; stir in the other can of coconut milk and the chicken, sugar, and fish sauce (this is naturally salty, so you don't need extra salt for this recipe). Bring to a boil; cook for 15 minutes or until the juices of the chicken run clear. Stir in the peppers and onion, cooking for another 10 minutes. Turn off the heat, and stir in the drained pineapple chunks.

Serve the Thai chicken over the jasmine rice.