Wednesday, October 20, 2010

Omelette Dinner for One

Due to the nature of his job, there are times when the husband travels. And during those times, I'm extraordinarily tempted to just order a pizza and nosh on it for three consecutive dinners. But I can't do that anymore. As tempting as pizza is to me (and hoo boy do I LOVE pizza), I haven't straightened out my eating habits for the past three months only to blow it because I can't control myself for one meal.

So, I've come to just craft some singles-only dinners from whatever is sitting in the fridge at any given time. Tonight, that dinner became an omelette. An omelette is one of those things I never made before, and when I did, I thought, "Well that was way too easy and tasty." And it really is very, very easy.

The basis of any good omelette is fresh eggs (I use local eggs, of course), salt, pepper, a well-buttered and nonstick skillet, and a low heat. That last bit is the most important. It's tempting to just whip up some eggs and throw them on high heat to cook quickly, but cooking the hell out of something like an egg is just not (in the words of Alton Brown) good eats.

My omelette preparation: crack open 3 eggs in a medium bowl. Add about 1 Tbsp. milk (this will ensure a fluffy omelette) and salt and pepper to taste. Whisk together and set aside. In a nonstick skillet, heat about 1 Tbsp. butter (again, I use farm fresh butter here) over low heat, turning the skillet around as the butter heats to coat the sides and bottom evenly and prevent sticking.

Pour the egg mixture into the skillet and let sit over low/medium-low heat for...well, I don't time mine. I go by looks alone here. You can tell when the egg is starting to set as it gets fluffier around the edges and takes on a darker look and begins to ever so slightly bubble in the middle. When it reaches this consistency, take a rubber spatula and run it gently around the edges of the omelette just to loosen it up a bit. The next part really depends on your level of taste in omelettes. I prefer a runnier middle, so after I've loosened up the edges and still have a runny consistency on the top of the omelette, I add cheese sprinkled down the center of the omelette (it was organic cheddar cheese tonight, but you could use Gruyere, provolone, Swiss...really anything you have on hand) to melt slightly. (If you like your omelette more done, go ahead and sprinkle on the cheese to melt, but you'll have to wait a while for the center to set perfectly--during that time, do not be tempted to turn up the heat.)

Next, I add my meats, veggies, etc. The great thing about an omelette is that you really can't go wrong with your fillings of choice. My filling of choice tonight was leftover roasted broccoli. But you could use onions, peppers, tomatoes, whatever your heart desires. Just sprinkle down the center, then take your spatula and flip one corner of the omelette over, pressing down slightly, followed by the other corner. (You should note that, if you really like a set omelette, this part isn't going to be pretty. Because the consistency is set, when you go to turn in the corners of your omelette, it is going to split, and you run the risk of your fillings spilling out into the skillet.) Then just slide gently onto a plate. Now, I prefer to add diced tomatoes at the end, but that's just me. And for those who enjoy some heat, Tabasco sauce makes a great complement for an omelette.


My side tonight was quick, sauteed potatoes. Seriously, I can't believe how long I've gone without making potatoes this way. I've always had trouble reconciling a crispy exterior to a soft interior when sautéing potatoes raw, but this little trick saves a ton of time and fretting. Just take a potato (I use new potatoes), stab it a few times with a fork just to ensure it doesn't build up pressure and explode in the microwave, and microwave for about 2.5 minutes. Carefully remove the potato (I generally use one per person), and, using a paper towel to hold it in place (and to keep your fingers from getting scorched), slice into about 3/4" discs, sprinkle with salt and pepper, and saute in olive oil over medium heat until lightly brown on the outside. It takes no time at all, and the texture is perfection.

Monday, October 4, 2010

Jamaican Jerk Chicken

The great thing about shopping at the farmer's market now instead of at the grocery store is the abundance of fresh meats. We already have a freezer well stocked by Shadowchase Farm, but we tend to eat chicken the most. And god, what a difference fresh poultry makes. It's a bit pricier (a 3.5-pound bird will run around $12 in this area), but the quality is well worth it (imagine that). Because we've cut back on meat consumption across the board, my usual plan of action is to just get up early enough to make it to the market by 8 a.m. on a Saturday to ensure I get a chicken if we need one for the week or two ahead. Our poultry choice is Weathertop Farm.


And no, you can't have the convenience of picking up a few pieces of a chicken (say, the breast or thighs as you would in the grocery store). But who cares? Part of the joy of cooking, to me, is getting to really experience the food. And while the thought of actually killing a chicken isn't something I want to do anytime soon, I feel better honing my chicken cutting skills than I would just picking up a hormone-filled piece of chicken packed on a piece of styrofoam and complete with one of those hideous chicken diaper things--you know, the white plastic thing that is placed under the cut of meat for some reason I've never really wanted to explore. (By the way, those "chickens" in the grocery store? During their short lifetime they have been packed to the rafters in the tiniest spaces imaginable and pumped full of hormones to stimulate the growth of huge breasts--basically the poultry equivalent of breast implants. Which means they grow so quickly that they're legs are rendered useless, so they eventually cannot support their own weight. Also? They're fed antibiotics to combat the plethora of diseases running rampant in those "living" conditions, and even still we're exposed to salmonella from chicken available in the grocery store. And for what? The sake of convenience and a cheaper grocery bill? You know what? I'll gladly take that $12 bird from the farmer's market that renders me eight good pieces of meat, a carcass for homemade chicken stock, and the knowledge that my bird had a good life, raised in the open pasture and allowed to be a chicken. I don't understand anymore those who choose to ignore what they eat because it's easier. I really don't want to pay your healthcare costs, thankyouverymuch.)


Stepping off the soap box....anyway. Yeah, Jamaican jerk chicken. That's the recipe I decided to use for my fresh chicken this particular day. I've started to drift more toward my Joy of Cooking cookbook for recipes and inspiration, and this is where the jerk paste recipe for the chicken was found.


So, Jamaican Jerk Paste:
1/3 c. fresh lime juice
10 habanero peppers (or 1/4 c. habanero-based hot sauce)
2 Tbsp. distilled white vinegar
3 scallions, coarsely chopped
2 Tbsp. dried basil
2 Tbsp. dried thyme
2 Tbsp. yellow mustard seeds or 1 Tbsp. dry mustard
2 tsp. ground allspice
1 tsp. ground cloves
1 tsp. salt
1 tsp. black pepper


Combine all ingredients in a food processor and puree. I omitted the scallions and subbed in the habanero-based hot sauce. This is a really nice, spicy blend (the allspice particularly stands out). I do wish I had gone with the raw habaneros, because it wasn't spicy enough. Anyway, I just brushed the paste mix on the cut chicken pieces and grilled on medium heat until done, basting with the leftover paste along the way.


It's important to note that, because fresh chicken isn't pumped full of god knows what, the cooking time is quicker. Therefore, I opt to go with the low and slow way of cooking when using fresh, locally raised meats. It's worth the time.


You can always brine fresh chicken as well to lock in the moisture--just do a simple Google search, and you'll find an encyclopedia of information and recipes, which usually just include a simple mix of water, sugar, and salt.


I'll get to the sides next: just some grilled new potatoes (again, from the farmer's market) and Asian pears.  Pears are pretty prevalent right now as it's their season to shine, so I just picked up a few and made a simple honey vinaigrette to drizzle over them (seriously simple--just combine some honey and lime to taste).


Now, I'm going to step back to the chicken. I'm still no expert at cutting a whole chicken efficiently, but I wanted to share a video that I've found is a great resource for some cutting tips. Yes, it's Gordon Ramsay, but he's helpful--he's not yelling. And again, if you're so inclined as I am, you can easily save the carcass and neck (yep, my fresh chicken comes complete with the neck, which you just have to lop off if it's there) in a Ziploc bag and freeze for future use in stocks. Voila--despite the initial cost, a fresh chicken can yield several uses.

Sunday, September 26, 2010

Steaks and Banana Peppers

Crap, I'm behind again on this blog. Between work and some dog surgery, I've put myself behind. So, I'm just going to dump what I did tonight on here, then cull through my photos from the past month to see what other "culinary gems" I can share.

Just a quick catch-up: I've made an even more conscience attempt to rid our house and, therefore, our cooking of processed foods. Most of our groceries are purchased at a local farmer's market or an ethnic, locally owned (i.e., non-chain) store in the area. The results have been well worth it, and I call bullshit from here on out for anyone who dares to say buying healthier is more expensive. Because you know what? Our household has already saved about $200 in grocery bills this month alone going the local route. Not only is it more cost-effective, it's also a great way to lose weight. I've lost 16 pounds in the past two months going local and cutting out the grossly overproduced corn products (such as high fructose corn syrup found in soft drinks) in my foods.

I will say that there are a few exceptions to our local rule. Mainly olive oil. You can't grow olives in Southwest Virginia, and I know of no locals who produce it. So, I rely on the aforementioned ethnic store (for those in the area who want to know, it's Oasis World Market) to purchase quality olive oil. I'm learning to weed out the processed staples (e.g., flours, grains and sugar) and sub in quality, organic staples. So far, that's meant using honey in place of white, granulated sugar and whole-wheat flour as a 1:1 substitute for the processed (and exceptionally non-nutritional) all-purpose flour.

No, this way of cooking is not convenient. This way of cooking means that when the tomatoes are done for the season, they are done. If I don't do any canning in time to bottle up the tomatoes, the peaches, etc., then that's it for the year. Which is okay, because after eating local produce for the past two months, I wouldn't look forward to trying to consume what's in the produce aisle of the grocery store, knowing full well it will be far inferior in taste and nutrition. Our house is going local, and it's going seasonal. It's a test, but it's been so much fun for this foodie to find creative ways to cook what's available in-season. It's how our ancestors cooked. Pretty sure it's how my great-grandmothers cooked. I like to think of what we're doing as an homage to them.

Anyway, off the soapbox and onto the recipes. Tonight was a ribeye steak (using, of course, grass-fed, grass-finished beef from our "supplier," Shadowchase Farm). To be honest, grass-fed beef is very tricky to cook. It tastes amazing, but it's also leaner than the "meat" you find in the grocery store. That means it cooks quicker than its grain-fed (inferior) relative. So, cooking grass-fed steaks has really been a learning curve that I can't quite nail down. Therefore, I'm leaving the cooking time out of this recap because I hit it at medium, and that's not the best way to eat a steak. I was shooting for medium-rare, which is the maximum doneness at which you should eat grass-fed steak (anything past that, and it becomes chewy and loses most of its healthy omega-3 nutrients [yeah, you just thought omega-3 came from salmon, didn't you? Turns out it comes from grass-fed, grass-finished beef as well; amazing what corporations can zap out of anything they get their hands on, and amazing what us little lemurs will eat without even thinking about it]).

But, I did like the marinade on this steak: 1/8 c. packed, fresh rosemary leaves; 1/4 c. olive oil; 1 Tbsp. balsamic vinegar; 2 garlic cloves, crushed; salt and pepper to taste. Place all ingredients in a blender or food process and puree until smooth. Place the steaks (I used two ribeye steaks, so if you have more steaks, just adjust the ingredients accordingly) in a glass casserole dish and cover with the marinade. I let the steaks marinade for about 2 hours because ribeyes are a notoriously tender cut of meat, so they don't need much help in the tender department.


Sides were white corn (from the farmer's market, of course) and a new favorite: stuffed banana peppers. A part of eating local is just grabbing something that looks interesting and trying to figure out how to fix it. I had six medium banana peppers sitting on our counter for about two weeks and wanted to use them. So, I did the following (again this was for 6 medium peppers; you can adjust the amount of ingredients below accordingly):

-Preheat the oven to 350 degrees.
-Cut the tops off of the banana peppers and remove the ribs and seeds (you can do this by running a sharp knife around the outside of the rib and scraping out the insides).
-Boil the peppers in water for about 5 minutes until tender; drain and set aside.
-Chop the edible parts of the banana pepper tops and saute in a medium pan over medium heat along with 1/2 c. chopped onions for about 5 minutes.
-Add 3-4 large chopped tomatoes (with juices) and 2-3 minced garlic cloves to the onion mixture; season with salt and pepper and 1/2 tsp. each ground oregano and basil. Saute for about 8-10 minutes.
-Divide the tomato/onion mixture evenly. In one bowl of the mixture, add about 1/8 c. grated (fresh) Parmesan cheese, a handful of Panko crumbs, and about 1/4 tsp. salt to the tomato mixture (the other half of the mixture will be used to top the peppers).
-Place the Panko/tomato mixture in a pastry bag (if you don't have a pastry bag, just place the mixture in a Ziploc bag, close the bag, and cut the tip of one bottom corner of the bag to serve as a makeshift pastry bag).
-Squeeze the Panko mixture into the banana peppers that have been drained.
-Place the stuffed banana peppers into a small casserole dish and cover with the reserved tomato mixture.
-Bake at 350 degrees for 45 minutes (check the peppers halfway through; if they look cooked, just reduce the oven temperature to 275 or 300 degrees).

Tuesday, August 24, 2010

Learning about Food

As I mentioned in a previous post (here), I've become a fan of Michael Pollan and his writings. I could quote left and right from his books, but it's just easier for you to pick up a copy and educate yourself. I will tell you what I have taken away from the books as an individual, and these are simple, simple lessons to learn: 1) eat less; 2) stay away from fast food. It's really that easy. Except it's not. In principle, yes, they are easy lessons. They are things we already know. There is absolutely no way in this big, crazy world that eating a shit ton of fast food is going to be healthy. It's not. We KNOW that. It's just easier. And cheaper. I was a fan of fast food. When my husband was out of town, I coveted the fast food because I forgot how to cook for one person.

But I've given it up.

In one fell swoop, I stopped eating fast food after the first few pages of "The Omnivore's Dilemma." I've also stopped drinking soda--I haven't touched one in about a month. This Southern gal has even foregone the sweet tea. The result? I feel 10 times better about myself, and I've lost close to 10 pounds in that month. I'm more energetic. But the funny thing? I didn't accomplish any of that by starving myself. I just made a conscious decision to try to get off the Western diet (that is, one of processed foods and large, fatty portions) as much as I could. I eat less. I pay attention to when I'm actually full, which happens (as it turns out) well before I finish everything on my plate. I've started cooking more with whole, local foods.

Which leads me to this post: I decided over the weekend to endeavor to make a dinner using local foods to the extent possible. The dinner? I decided on spaghetti with meatballs. That meant the meatballs included only local, grass-fed and grass-finished beef (from Shadowchase Farm, a farm committed to producing grass-fed and grass-finished beef; we've since decided to order a family pack from them to stock our freezer), the sauce was homemade using ingredients that came without a bar code, and the spaghetti would be made from scratch.

Fortunately, I will say I have loved to cook since I was young. To me, cooking is therapy and probably speaks more to my obsessive compulsive desire to control things. But I love it. To me, this dinner was something I looked forward to making all week long. On morning runs, I would think about the ingredients to use, how to prepare everything just right.

Of course, I was daunted by one ingredient: the homemade spaghetti. You see, I love all things dough, but never has dough returned the favor by being easy on me in terms of recipes. I'm intimidated by making bread, and the thought of having to make something that requires kneading and resting makes me nervous.

Which is probably why, no, the spaghetti didn't turn out as well as I hoped. It was edible, yes, but it wasn't a quality consistency. I went into the recipe intimidated, and it showed in the results. Was it a disaster? No, not hardly. It just means I need more practice. The recipe I used was fairly simple (except I subbed in unbleached whole wheat flour because, well, I wanted whole wheat pasta). The eggs I used were from a local produce stand that sells the eggs on behalf of a local farm. So, my intentions were good in terms of the ingredients used--I just need to approach pasta-making the next time with more confidence, a better recipe, and (ahem, if anyone is so inclined to purchase it for me) a pasta machine (no, I don't have one, so I thought I could get by with rolling the dough by hand and slicing with a knife).

See? They totally look like pasta noodles.

I am happy to say, however, that the meatballs more than made up for the iffy pasta. Using one pound of the local beef from Shadowchase, I mixed in one egg (again, using only local eggs), about 1/2 tsp. salt, and freshly cracked pepper. I've never made meatballs before, but I've watched enough cooking shows to know that, if you want them to bind together well, it's best to use breadcrumbs in addition to the egg. I wanted to use some herbs, and I definitely didn't want to use store bought breadcrumbs, so I found the best of both worlds: a bit of leftover olive rosemary bread from a local bakery. I just sliced up the bread and popped it into a food processor to make about 1 c. of fresh breadcrumbs, tossing those in with the meat mixture. I rolled the meat into about 1.5" balls and placed them into the refrigerator to chill (I've found chilled meat works best when cooking patties or meatballs).

Meanwhile, I heated a large saute pan and about 1 tbsp. olive oil to medium-high heat and brought about 6 quarts of water to a boil in a separate pan for the pasta. I placed the chilled meatballs in the heated saute pan, cooking for about 6 minutes on each side, then turned them around the edges to brown. When finished, I removed the meatballs to a plate and tented them with aluminum foil to lock in the heat.

Overnight I had thawed some leftover homemade pasta sauce, so I poured that straight into the pan I used for the meatballs. I brought the sauce to a simmer over medium-low heat, then placed the meatballs into the sauce and covered, simmering and stirring occasionally for about 20 minutes.

It's important to note that, if you make homemade pasta, it takes much less time to boil the noodles. So, when my water came to a boil about 10 minutes before the meatballs and sauce were done, I poured in about 1 tbsp. salt and a drizzle of olive oil (to prevent the pasta from sticking together or to the pan), and boiled the pasta for about 6 minutes.

The result:

I'm sorry--there's no way for me to make spaghetti look edible in pictures.

A side just included shredded lettuce topped with cucumbers and cherry tomatoes, both purchased from the local farmer's market.


This way of cooking is, yes, a learning curve. It's not simple, but I've learned that actual food itself isn't simple. It's a process, it takes time. But you know what? I don't miss the processed, fast food or drinks. At all. 

Wednesday, August 11, 2010

The Potpourri: Quesadillas, Grass-Fed Beef, Farm Fresh Eggs

So some more catching up to do, I suppose. I'll start with a pretty straightforward meal we made a few nights ago: a Jack Cheese and Peach Quesadilla. I followed this, for the most part, verbatim (excluding only the cilantro because it's just not my favorite). I also used chicken tenderloins grilled with a salt, pepper, and chili powder seasoning as opposed to the rotisserie chicken suggested in the recipe. I grilled the chicken first, then kept the bit of chicken drippings warm so that it could be used to grill the tortillas and give them a bit of seasoning.


Sides included roasted potatoes (just quartered white new potatoes patted dry and tossed with roughly quartered onions; seasoned with salt, pepper, a touch of cayenne pepper, and chili powder; roasted in the oven at 425 degrees for about 25 minutes, tossing halfway through roasting time) and fresh tomato salad (tomatoes purchased from the produce stand, including Cherokee purple, a pink tomato, and a striped tomato, tossed with some olive oil, white wine vinegar, cumin, salt, and pepper).


See that green stuff? Yeah, picante habanero sauce, baby. Tabasco doesn't cut it for me anymore. Pretty sure the hubby blacked out for a few minutes after consuming one potato doused in the sauce.

Now, onto the more complicated recipes. I've become extremely involved in reading "The Omnivore's Dilemma," a book that has dramatically changed the way I think about food. I don't want to give a book report here, but it's an eye-opening, educational book. It is not a diet book but, instead, a book urging its readers to step away from the Western diet. In essence (at least to me), it is a non-diet book, a guide to quit a diet, in fact, that is obscenely affecting our lives. The Western diet, in a nutshell, is the quintessential American diet, one underlined by fast food and convenience instead of Slow Food (a movement quintessential to Italians who, despite their consumption of wine and what we consider fattier foods, are healthier because of the very way they eat and view food, or their relationship to food). The horrors of what we choose to ingest are positively overwhelming and, as a result, I have not touched any fast food nor any sodas in the weeks I have been reading Michael Pollan's diatribe. (In fact, I've lost more than 6 pounds by taking to heart Pollan's lessons, combined with running.) Overall, I am trying to make a conscious effort to become more, well, conscious of what it is I am eating. I can point to countless paragraphs in "The Omnivore's Dilemma" that just make sense (all of it, actually), but I will spare you: all I can say is, if you want to change your eating habits, go buy or check this book out from the library. For my part, our household grocery shopping habits are changing, and I am starting to lean more on a local produce stand, the farmer's market, and local meats. I want to know what it is I am eating, where it came from, its origins, something that is at the very heart of Pollan's book. You just can't do that at the grocery store. So, starting with baby steps, our meals have evolved (thought not completely as you will see) to have an origin that is local, not one whose only story is a barcode and a distribution origin of god knows where.

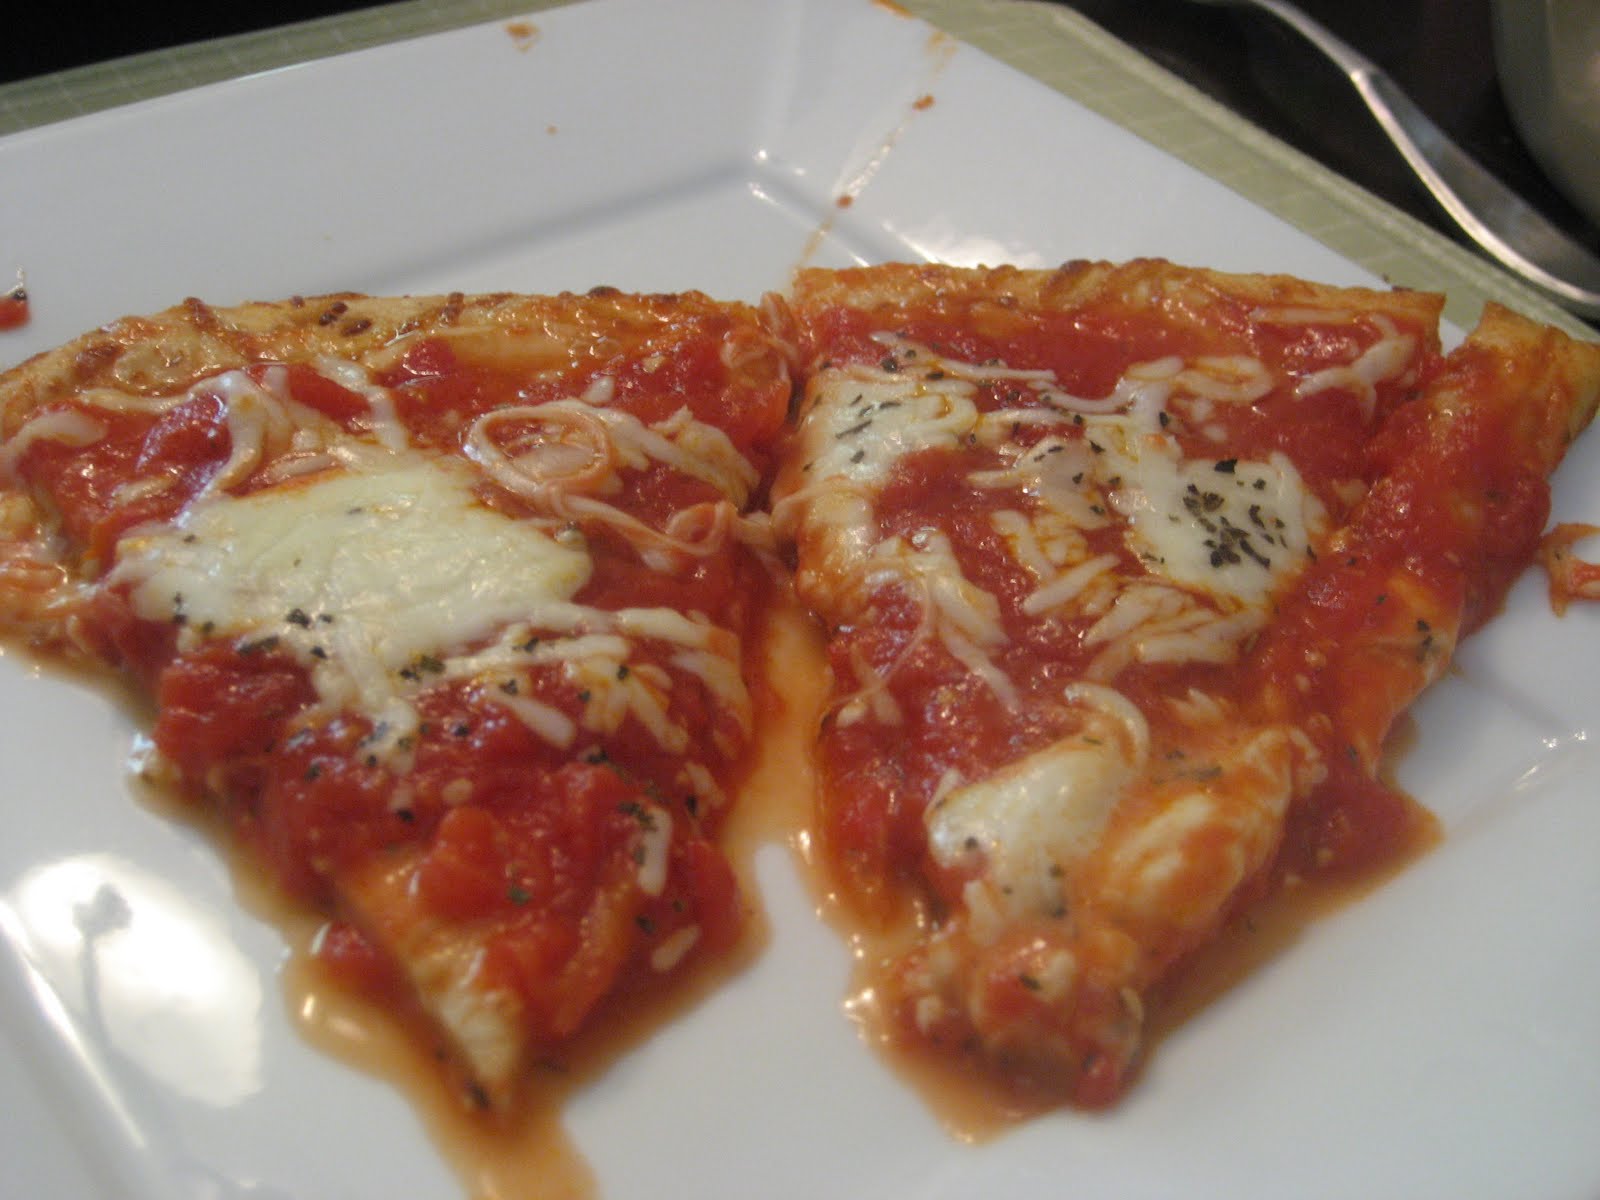
To start, I made a homemade lasagna Monday evening. This comprised a spaghetti sauce I made from scratch using tomatoes that were grown by the hubby's great-uncle. The sauce was simple: I just poached about 13-14 whole tomatoes in boiling water for about a minute to loosen the skins, peeled off the skins, squeezed out most of the seeds, and gave them a rough chop. I sauteed some peppers and onions (both of which came from the local produce stand just down from my house) in olive oil (sadly, I have not learned to make olive oil yet), added the tomatoes, seasoned, and tossed in some tomato paste (something, again, that came with a barcode from the grocery store; but I will learn how to make it from scratch one day).

Next up: the all-important meat. This is where I came to respect Pollan's book because he does not make a case for vegetarianism (something I tried for three years and failed at rather miserably). Instead, he makes a case for becoming a better, healthier meat eater: by learning where you get your meat and ensuring that meat came from, well, happy cows, chickens, pigs, etc. Happy cows are not the product of industrialization, a process that feeds corn and grain and, yes, animal byproduct to fatten a cow more quickly than nature ever intended. That, my friends, is a food chain that is full of petrochemicals, of pesticides, of toxins that us humans consume as well. No, happy cows are grass-fed cows because that is what nature intended. (Or, as Alton Brown pointed out in a recent episode of "Good Eats," you never see cows grazing in a cornfield, do you? That's because it's NOT NATURAL!)

So off my soapbox....where was I? The meat. We made a trip about a week ago to a local cafe called Mikie's 7th that serves sandwiches using the grass-fed beef raised on a local farm called Shadowchase Farms. We picked up a few pounds of their pre-packaged, frozen beef after a delicious burger (seriously, grass-fed just tastes better, and is actually leaner in fat; more expensive, yes, but look at it this way: if you spend more, you're more likely to ration out the meat, thus eating less meat in the long run). So, the next part in the lasagna was the use of that beef, which I just seasoned with a bit (and I mean just a dash) of salt and pepper and browned over medium heat. I then added the homemade spaghetti sauce and used some extra tomato paste to thicken up the sauce as needed.

I boiled some lasagna noodles (again, something that came with a barcode, but I'm determined to cut out that middleman and learn to make my own pasta the next go-round), and started layering the meat sauce, noodles, and mozzarella cheese (okay, I don't know how good I would be at making mozzarella, but I tried to use the least-processed cheese I could find at the grocery store). I baked it all off at about 325 degrees until the cheese was a golden brown.

Lasagna, starring grass-fed beef.

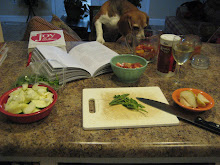
Okay, I may turn this into a novel by the end of this, but next up was the classic "Breakfast for Dinner." Last night, after reading a particular passage in "The Omnivore's Dilemma" about the production of eggs that end up on the grocery store shelf, I promptly trashed half a dozen eggs that were purchased from Kroger because I could not possibly put in my mouth something obtained from so hideous a means (and yes, you could argue that those poor chickens lived their squalid lives in vain to give me eggs that I just threw away, and trust me, I had that internal dilemma, but I couldn't bring myself to eat them). I vowed to go get some fresh eggs that had a transparent story (that is, the lady at the produce stand could tell me from where the eggs came [the farm]). I started at the farmer's market, but they were fresh out of eggs. Instead, I came home from the farmer's market with some local cherry tomatoes, garlic bulbs, fresh farm butter, and cheese curds (yeah, I have no idea what to do with those, but they're quite tasty). I relied on the produce stand for my fruit for dinner and the fresh brown eggs.

So, the menu: French toast (using 7-grain sourdough bread purchased at a local bakery; and yes, that is another ingredient I am determined to learn to make from scratch), bacon (sadly, this was the stuff bought in the grocery store, and this time around, I couldn't bring myself to throw it out; next time, no bacon unless it's local), scrambled eggs and fresh fruit.


I started by making the French toast batter: three farm fresh eggs whisked with about 1 tablespoon of milk, cinnamon, a dash of nutmeg, and a dash of salt. I dunked the sliced sourdough into the batter and let it sit for a few minutes to absorb. Meanwhile, I sauteed the bacon until a slight golden brown and removed to drain on a paper towel. I poured out most of the bacon grease, saving just a bit for use in a few minutes. I preheated a grill for the French toast and whisked together another three eggs with a bit of milk, salt and pepper and poured them (over medium-low heat) into the skillet with the touch of bacon grease, stirring occasionally. I then grilled up the French toast and plated it all, serving it with the farm fresh butter, and voila!


There will be much more to come in later days as I get a better grasp on realizing the origins of our food and how to incorporate that into our meals. It's definitely a challenge to make a conscious effort to quit the Western diet, but I have to say: I've never felt better and more conscious of what it is I am eating, something to which we should all pay more attention before our healthcare costs and overall health skyrocket beyond control. Seriously, pay attention to what you eat; care about where it originates. It's worth your time.

Sunday, August 1, 2010

Catching up. Again.

Damn, I'm way behind again. This month has passed too quickly.
So, instead of bogging this blog down with all of the dinners we've made the past, well, almost month, I'm going to hit the highlights. Which, for the most part, will be the entrees. If you want tips on the sides (which were pretty basic across the board), just send me a quick note.

So, first up: Chicken and Guacamole Tostadas.


Nothing too revolutionary here, but I'm getting drawn more and more to the simple yet flavorful. It's a basic principle in my favorite cuisine, Italian, but it can easily be implemented in any recipe. For this recipe, the simple guacamole was the standout. I like guacamole, but I'm not known to pig out on it. But this....this I could have eaten in bulk, with or without tortillas or tostadas. I did make a few basic changes to this recipe. First I cooked some split chicken breasts seasoned with salt, pepper, and smoked paprika because I am not the biggest fan of the rotisserie chicken in the grocery store. I'm not totally against it, so if that's all you have time to do, go for it. Secondly I omitted the cilantro, because I am one of "those people" who just do not like that herb. To me, it tastes like dish soap. Again, go for it if it's up your alley.

Next: Crunchy Lemonade Drumsticks.


This is perhaps the oddest mix of ingredients I've used in a while, but the results were tasty. I particularly liked this recipe because it had the texture of fried chicken without the unhealthy side effects of frying (instead, it's baked). If you're like me, you'll start making this recipe and, halfway through, will really start to think, "What the hell? This is going to be interesting." But stick it out to the end--it's worth it. I'm a big proponent of Panko, and while you don't necessarily think of an Asian-inspired ingredient meshing with the old standby of country-style chicken, it works. It works very well. My only issue was in the baking. In the original batch, I went with what was recommended in the recipe (baking the chicken on top of a rack placed on top of a baking sheet). It kind of worked, meaning one side turned out perfectly golden. The other side, even with the use of copious amounts of cooking spray, stuck to the rack and required the use of a pair of tongs to pull off and reassemble the skin. Which is not ideal. The second time around (which was the next day using a new batch of drumsticks and thighs) I decided to omit the use of a rack over the baking sheet and instead used a parchment-lined baking sheet. This worked only a tiny bit better. I was still pulling skin off of the sheet when I went to flip the meat. So, next time I make this, I may just be using a glass casserole dish, non-lined. We'll see how that goes.

Finally, Roasted Pepper Pasta.

The salad wanted center stage. But the pasta is in the background.
Again, this is a relatively simple recipe. I highly recommend roasting the peppers as instructed, as well as the garlic. Sure, you can buy both already processed and bottled in the grocery store, but where's the fun in that? (Plus, god y'all, I've gotten sucked into Michael Pollan's The Omnivore's Dilemma, which has burrowed itself into my brain and is starting to affect all of my food choices and has made me question the "efficiency" of buying what is in the grocery store; I'm contemplating a completely separate blog to discuss this book. But I digress for now...) Go pick up some peppers from your local produce stand or farmer's market along with some garlic and roast it as suggested in the recipe. Seriously it only takes 8 minutes. Worth it.

Seriously, just roast the peppers and garlic. Don't cop out and use the jarred stuff. Be connected to what you eat!

Anyway, I omitted the almonds in this one (I had plenty of crunch from the roasted peppers) and also opted not to rinse the rigatoni after boiling because, I don't know, I always thought it was a sin to rinse off pasta and all of the good starches that keep the sauces sticking to the pasta. That's just me. You do what floats your boat. Overall, we found this a very light but flavorful pasta--definitely worth keeping in the recipe "index."

Oh, and just kidding about that pasta being the final recipe in this post. I'm going to throw in a dessert, something we rarely eat now (except for fresh fruit). I decided to make a granita, a very light, Italian-style dessert.

The first time in years we have used our martini glasses. Though doesn't "Mad Men" make it look ridiculously cool?

I used 2 c. of pomegranate juice (you can use whatever juice you like) in which I dissolved 1/3 c. sugar over medium heat (the mixture does not need to be boiled, just stirred frequently until the sugar is dissolved). Remove from heat and add 1/4 c. lime juice (this will produce a pleasant tartness and a very cool sheen effect). Pour the mixture into a glass casserole dish. Set in the freezer for about 5 hours total; every hour or hour and a half, pull the granita out of the freezer and run a fork through the mixture to break up the granita so it does not set into an ice block. I served these in chilled martini glasses. Simple, easy, and flavorful.

As mentioned, I plan to do a post about The Omnivore's Dilemma as soon as I can get my head wrapped around everything it teaches. It's a lot to digest, a lot to absorb. But I think for the better.

Monday, July 5, 2010

Double Feature: Eggplant and Pork

I'm running the risk of getting behind on posting again, so I'm going to knock two entrees out at one time.

First up: Filled Eggplant with Polenta
For a while now, I have been religiously reading Frances Mayes' books that focus on her time living in Tuscany (she's probably most noted for authoring "Under the Tuscan Sun" on which the movie starring Diane Lane was based). I used to find her writing engaging and something to which I could relate, not because I could shell out my life savings to just up and buy a villa in Tuscany in desperate need of repair, but because I am in love with all foods Italian. Especially, as I've come to find, the rustic food of Tuscans, something I hope to experience first-hand in just two short years. Her previous books were laced with Italian recipes, the result of her time spent with Tuscans and learning to cook with them. So, when I picked up her latest tome, "Every Day in Tuscany," I was looking forward to settling back in after several years with her authentic recipes. To make a long story short, I was disappointed by the almost condescending tone of Mayes' latest and managed to sift through the fluff to find the recipes. One stuck out, a filled eggplant, because we've been incorporating more and more eggplant into our diet since it is readily available in our big-chain grocery store.


This is a relatively simple recipe, a key to my fascination with Tuscan cuisine: making simple ingredients taste amazing by doing very little. To start, preheat the oven to 375 degrees F. Then:

  1. Cut one or two eggplants (depending on your serving size; one half easily feeds one person) in two lengthwise.
  2. Being careful not to rip the skin (I found buying an extra eggplant worked well here because I could have a practice run, something I needed because I ripped the hell out of the first half), scoop out the seeds and the white part. I will tell you now that eggplant is not easily scooped--the "white part" is very stubborn and does not scoop as easily as, say, cantaloupe. After my trial run of ripped skin, I found it best to hold the eggplant half in my hand firmly, scoop out the majority of the seeds, then proceed to the fleshier part, almost mentally dividing the half into fourths and working on each section as gingerly as was possible. It's okay if there is some white flesh left--you'll be baking the eggplant, so you won't run the risk of consuming raw eggplant, something that should be avoided as the veggie contains toxins in its raw stage. Though it won't kill you, it's not the best thing to consume raw eggplant.
  3. Chop the white part of the eggplant and set aside.
  4. In a saute pan, heat 4 Tbsp. extra-virgin olive oil over medium-high heat.
  5. Add one large onion, chopped, and saute until softened (approximately four minutes).
  6. Add 4-5 garlic cloves, minced, and continue to saute for another two minutes (be careful not to overcook the garlic). 
  7. Add the chopped eggplant, five chopped tomatoes (or a mixture of canned diced tomatoes, drained, and fresh tomatoes), 2 Tbsp. tomato paste, and salt and pepper to taste.
  8. Cook the eggplant mixture for about 10 minutes.
  9. Place the eggplant shells on a foil-lined baking sheet that has been lightly coated with extra-virgin olive oil.
  10. Fill the shells with the eggplant mixture and sprinkle with 1/4 cup Parmesan cheese (I avoid the green-canned stuff and opt for the Parmesan wedge and grate what I need).
  11. Bake for 20-25 minutes.

I served this with polenta (yes, of the tube variety, which you should be able to find in the grocery store; I always buy the plain, or original, flavor) topped with pancetta. Start by cooking the pancetta in a saute pan over medium heat until crispy (it will end up being the texture of crispy bacon). Remove the pancetta, crumble and set aside. Saute the polenta in the pancetta drippings (again over medium heat) until a golden brown on both sides. Another side: just your basic salad.


Next up: Greek-Style Pork Chops
So, just go here. I didn't make many adjustments on this other than a bit more salt to season the pork. I also cut some pitas to serve with the meal, brushed them with extra-virgin olive oil, sprinkled with salt, and grilled lightly after pulling the pork off the grill (just because I find grilled pita is much tastier than pitas served right out of the bag). Also, when you pull the pork out of the marinade, be sure to get the bits of garlic off of the meat or you'll most likely burn it when the pork is on the grill.

Sunday, June 27, 2010

Blackened Salmon with Roasted Pineapple Salsa

I'm increasingly trying to cut the umbilical cord, so to speak, with cookbooks. I'm becoming a firm believer in using recipes as a blueprint, moving and experimenting from that foundation and incorporating what we like or removing what we don't need or immediately have on hand. For whatever reason (because I do know people who are intimidated by the culinary world of seafood), I feel more at ease using seafood for a meal created completely from my design. To me, seafood can be used in the most diverse ways: added to a tomato sauce base, fixed into little patties to be sauteed a golden brown, or simply dressed with some lemon juice and salt. The possibilities are endless (although I am mindful of the short supply and quality of seafood now available thanks to human greed and an unnecessary oil dependence, an event that is so unsettling and maddening; I made a conscious effort to buy salmon for this recipe that was farm-raised).


I knew I wanted a blackened salmon for this meal (one of the simplest recipes in my repertoire: rub Louisiana blackened seasoning, which can be found in any supermarket, on both sides of fresh salmon; saute over medium heat until the salmon can be easily flaked with a fork). I also wanted a salsa to accompany the salmon;  I decided to start with some roasted jalapenos. I have used roasted jalapenos before in other meals and found myself craving the little peppers more than the protein on my plate. So, I picked up about six jalapenos (because I really, really like peppers), sliced them in two, and ran a spoon down the middle to remove most of the seeds and the membrane (where the heat is mainly located). I then sliced them relatively thin and tossed in about 2 c. of cubed, fresh pineapple. I tossed in about 2 Tbsp. of honey to bring out the sweetness of the pineapple and mitigate some of the heat of the peppers and added the juice of a lime (do not for the love of all that is holy use that crappy lime juice in a squeeze bottle; that's really just an affront to cooking). I roasted the salsa mixture in the oven on 425 degrees for about 20 minutes, stirring the mixture halfway through roasting time.  I then poured the mixture into a bowl and added a bit more honey and lime juice to taste.

Now, for the sake of honesty, I took a bite of the salsa on its own. And immediately every pore in my body opened up because, yes, it's a very spicy salsa. I was worried it would be almost inedible, not to me (because my tolerance and love of heat in food is growing exponentially), but to the hubby. And yes, he took a bite when dinner was served, and I saw him struggling to fight back the urge to spit the salsa back onto the plate. But, I found that, when eaten in conjunction with the salmon, the salsa cooled significantly. I'm not sure if the husband really agreed, but he did finish his side of salsa (I like to think it was because the salsa was a good, slow burn kind of heat, not because I kept calling him a pussy). So, moral of the story? Adjust the number of jalapenos you use unless you really want to sweat it out.

Sides here included a Spaghetti Salad (another cooling agent, especially with the use of cucumbers) and corn on the cob.

Dessert was one of my favorites, something so unbelievably simple. Ready? Just slice some fresh strawberries, sprinkle with about 1 to 1.5 Tbsp. of sugar and drizzle with balsamic vinegar. The tartness/sweetness is perfectly balanced and could be used on any combination of fresh fruit.

Sunday, June 20, 2010

Welcome Back with Pasta

Have you missed me? Of course you have, what a silly thing to ask. I realize it's been more than a month since I've posted any new recipes, but I've been immersed in the world of work and roller derby, the latter of which has quickly become more of a lifestyle than a mere sports hobby. During my month away, I haven't stopped cooking (it's too much of a passion to quit)--I've just stopped posting for the time being, despite my best intentions to do otherwise. There are recipes and pictures of a month's worth of new recipes sitting on my camera, waiting to be uploaded, but I'm not sure where to start. It just seems simpler to start with tonight's meal and move from there, maybe flipping back through pictures from the past month to see if there is anything that should absolutely be posted.

Tonight's meal was pasta with a quick-roasted tomato sauce (although I hesitate to use the word "sauce" for this recipe, meaning that, if you're looking for a thick, tomato-based sauce, you'll need to look elsewhere). We have started trying to incorporate more vegetarian meals into our repertoire, mainly because we tend to consume way too much meat and, for both of our active lifestyles (the hubby is a hardcore triathlon-er), it's just a healthier option as both of us tend to succumb to the (very bad) habit of thinking, "I worked out really hard, so I'll eat whatever I want" (although I'm definitely more susceptible to this line of thought than the husband). Having said that, this was a very basic, simple pasta recipe. My only suggestion is to add more salt to the pasta and a tad more crushed red pepper if you crave a little heat with your meals (with only 1/8 tsp. listed, the heat index is barely there). Also, don't be deterred by the use of a Dutch oven--although I practically covet mine, it's really not necessary for this recipe. In fact, I plan to use just a regular saucepan next time around.


The side to this was just a basic iceberg salad using almost every vegetable I could find in our refrigerator: cucumbers, tomatoes, yellow squash, carrots and broccoli.


I rarely make dessert because, well, we would just get in trouble weight-wise if I baked every night. But today, I was really craving a citrus-based dessert. Me, I love my citrus--give me a choice between a lemon wedge sprinkled with sugar and a slice of the most decadent chocolate cake you can find, and I will inevitably choose the lemon. Today's cookies, what I've dubbed the Double Lemon Sugar Cookie (yeah, I'll work on originality later), is inspired by a cookie that I fell in love with, one from a local bakery. The inspiration, a Vegan Lemon-Lime Sugar Cookie, is amazing--soft, somehow refreshing, incredibly moist (I have yet to figure out how a vegan cookie can achieve such a consistency--if you have a great vegan sugar cookie recipe, send it my way!), and deliciously citrusy. So today's goal was to almost replicate that taste, although I knew I could not achieve it from a vegan standpoint. Instead, I found this basic Lemon Sugar Cookie recipe, which I drizzled with a simple glaze (1.5 c. confectioner's sugar whisked with enough fresh lemon juice to create a smooth consistency) while the cookies were still warm. And yeah, total goodness. Although, to be quite honest, it wasn't quite citrusy enough for my palate, a problem I believe can be solved next time around by adding more lemon zest and lemon juice to the cookie dough. I would also like to add lime juice/zest to the mix for the next go-round (I've found a double whammy of lime and lemon, with even a base of orange zest, really ups the citrus ante). But overall, this was a great place to start.

Monday, May 10, 2010

Spanish-Style Spaghetti

When I'm on my own for dinner, I usually resort to a casserole or spaghetti. It's quick, usually pretty flavorful, and makes a large quantity that can be used for leftovers. This Spanish-Style Spaghetti looked pretty appealing, so I thought I would give it a shot. I also had my reasons for trying to find a quick recipe that incorporated saffron, a spice that I have had sitting in my pantry for about two months without any use. The verdict? Just so-so. It actually had a very pizza-like taste to it, just on pasta. Decent, and very filling, but I doubt I will use this as another go-to for a weeknight meal. I did sub in black olives for the green ones recommended in the recipe, just because I prefer the black olives. Surprisingly, the crushed red peppers got lost in this recipe and did not provide much of a heat profile.

(Also, I cannot get a decent shot of spaghetti without it looking like the Flying Spaghetti Monster. Deal with it.)

Carne Asada Chicken Tacos

So....there is no way I can go back to the boxed tacos mixes now that I've found a quality carne asada recipe. I started with this recipe for the pickled onions (which, by the way, don't try them on their own; they taste amazing on the tacos, though) and moving to this recipe for the carne asada marinade. Go for the mojo sauce in the Tyler Florence recipe and marinade chicken or flank steak for at least three hours. I took three skinless chicken breasts and sliced them horizontally, pounding out each half to make for a quicker grill time. After marinating, I brushed off any residual garlic from the meat to avoid burning any garlic (a taste that will overwhelm anything you cook) and placed the chicken on a preheated grill pan.


The marinade is really just as simple as those boxed taco mixes, but the flavor is much fresher and much, much better. Just try it. Garnishes included the pickled onions, chopped tomatoes, shredded cheese and diced avocado.


Sides included some mashed black beans that were heated up with a splash of chicken broth and chopped green chiles. And (you'll be seeing a lot of this): fresh corn. I really cannot get enough of fresh corn when in season, so it will probably grace our dinner plates more than once a week until the hubby starts begging me to find something else to serve with the entree.

Monday, April 26, 2010

Blackened Chicken Philly Subs

Every once in a while I decide to try to recreate a menu item from a favorite restaurant. This came about one night while the hubby was out of town, and being too lazy to run out to grab a meal, I found a spare piece of chicken in the fridge that needed to be used. I decided to try to recreate a blackened chicken sub I quite enjoyed at a local Italian restaurant, but it seemed to morph into a chicken philly sub along the way. Hence, the Blackened Chicken Philly Sub.


So, here's how it goes:

1. Brush chicken breasts (I used bone-in split breasts with the skin on for this go-round, just because the bone and skin combine to provide much more flavor than skinless chicken breasts; you can always remove the skin before serving) with canola oil and season with salt, pepper and Cajun seasoning, making sure to season the outside of the skin as well as under the skin.

2. Heat a nonstick skillet on medium-high heat; add the chicken and sear on both sides for approximately 12 minutes each side. Meanwhile, heat the oven to 440 degrees F. Once the chicken has been pan-seared, move to an oven-safe dish and bake for 15 minutes. (I originally thought searing on a high heat in a pan and then transferring the chicken to an oven set on a lower temperature yielded juicier results, but I swear the chicken came out juicier after baking on a higher heat).

3. While the chicken is baking, thinly slice a green pepper and white onion; saute in one tablespoon of canola oil on medium heat until softened.

4. When the chicken and veggies are done, place them to the side to let the juices set in the chicken. Meanwhile, brush sliced hoagie rolls with canola oil and brown on the heated skillet used for the veggies.

5. Now here's the key to a juicy sub: once the rolls are browned, remove and brush with mayonnaise (yeah, of course the secret involves mayo). Slice the chicken, place on one side of the roll, and top with the veggies and shredded mozzarella cheese.


6. Serve with baked fries.

Grilled Chicken Thighs with White Barbecue Sauce

And here I am playing catch-up again. Most likely this will be the last post this week, because we are hella busy (and because my birthday is coming up, and I have requested pizza from a local restaurant, so there goes a few nights off from cooking). So first up: Grilled Chicken Thighs with White Barbecue Sauce. From what I recall, the only tweak I would make next time around is to sear the chicken thighs (a process that seals in the juices) and grill them a little longer. The key is to marinate the chicken in the dry rub for at least four hours as instructed.


If you've never tried white barbecue sauce, it's a great break from the norm, with mayonnaise used here as the base instead of ketchup. I subbed out the white wine vinegar for the standard white distilled vinegar, and it worked just as well.


Sides included "heavenly" cornbread and pasta salad.


Monday, April 19, 2010

Steak and Fries

I'm just going to go ahead and warn you that, no, the pictures of steak below are not the most appetizing. But how do you capture on a digital camera something so perfect as a medium rare steak?! I tried, I failed, but you'll just have to deal with it.

I've done the steak and fries post before, but I mainly wanted to include this new post because of the fabulous new way I've discovered to make baked fries. I've become very spoiled by baked fries, and the fast food kind are just soggy, limp versions of what a potato really could be. I'm going to go step-by-step on this one:


1. Preheat the oven to 440 degrees F. Cut three Yukon gold potatoes into 2-inch wedges. Drop the wedges into a large bowl filled with iced water; let sit for about five minutes (this just pulled the sugars out of the potatoes; if you skip this test, you may end up with unevenly baked fries).
2. Drain the potato wedges and blot dry with a paper towel (this ensures a crispy outside and a perfectly cooked inside during the baking process).
3. In a small saucepan, heat 2 Tbsp. canola oil over medium heat. Add 4 minced garlic cloves and heat for 1 minute (any longer and you run the risk of burnt garlic). Pour the oil through a small sieve over the dried potato wedges; set the garlic aside.
4. Sprinkle the wedges with salt, pepper, and cayenne (if you want a little heat) and toss until evenly coated with spices and the garlic-infused oil.
5. Evenly spread the wedges onto a greased baking sheet; bake for 24 minutes, flipping halfway through cooking time.
6. When the potatoes are baked, sprinkle with a little more salt if needed and add the reserved garlic bits.


The hubby was in charge of the steak, which was just seasoned with some steak seasoning and placed on a heated grill pan until medium rare.

Salmon Sandwich with Lemon-Tarragon Slaw


Hey, look at me updating two days in a row! So first up is a Salmon Sandwich with Lemon-Tarragon Slaw. Yes, I know the recipe title in the link says arctic char, but really? That's pretty difficult to find in a Kroger. Salmon is the logical substitute here, and it was delicious. The only tweak I made was the addition of Cajun seasoning, because blackened salmon is pretty much the only way I can get the hubby to eat that particular fish.


The slaw was the perfect acidic complement to the fish. It's not your usual sweeter slaw, which I usually prefer, but this version works very well.


Sides here included grilled asparagus (just trim the ends of fresh asparagus, drizzle with olive oil, and sprinkle with salt and pepper; grill for about 8-9 minutes total on medium heat and finish off with some fresh lemon juice) and a pasta salad, both of which, combined with the sandwich, screamed spring on the plate.


The pasta salad is one of my favorite go-to recipes to herald in spring. It's an extraordinarily simple salad and can last in the fridge for about a week (it will probably take you that long to eat it all if you don't plan on bringing it to a potluck or picnic). All that's needed is 1 pound of pasta cooked to the specifications on the box (I prefer fettucini, but spaghetti works as well) and drained and rinsed with cold water, 2 tomatoes chopped, 1 cucumber chopped, 1/2 red onion chopped, a bottle of Italian dressing, and salad seasoning. I normally just throw in the drained and cooled pasta and veggies then add dressing and seasoning as needed, tasting along the way.

Sunday, April 18, 2010

Pizza Pizza

That whole updating regularly thing isn't working out so well, and after being on skates for 4.5 hours today, I have just enough energy for this one post. So you'll have to wait for a catch-up tomorrow. Tonight's menu was as simple as simple gets: pizza and salad. I've tried homemade pizzas before (okay, more like homemade pizza sauce on a store-bought crust because whenever I see the word "yeast" used in a recipe, my brain shuts down, either from fear of making dough or from a fear of knowing that, if I could make the dough, we would gain 100 pounds from eating bread, doughnuts, etc., so I just choose to act like I can't make dough from scratch), and this sauce I pulled from Cooking Light has been the best so far. It wasn't quite as thick as I prefer, so I may experiment with the texture the next time I try this, but the recipe overall was simple and full of flavor. Because I'm such a food dork, I had actually heard of the San Marzano tomatoes specified in the recipe as being the more superior of the canned tomatoes. And I have to say, they were right about that. It's just a lighter, almost sweet version of the regular canned tomato, and the salt ratio was much easier to control. If you can find the San Marzanos in your Italian section of the grocery store, go for it.


Because of that aforementioned phobia of making dough from scratch, I'm always a little weary of trying out the store-bought brands of pizza crust. We've tried the Pillsbury refrigerated crust, but it always ended up a little soggy in the middle and didn't really hold up to the toppings (and it did NOT reheat well if any leftovers remained). This time around, we tried a Boboli crust (usually hanging out in the Italian aisle). This was crunchier and held up well to the sauce, so this will probably be our go-to crust unless something better comes along. I just spread the homemade pizza sauce on the crust, leaving about a 1/2-inch border, and topped with thinly sliced fresh mozzarella (another ingredient that shouldn't be overlooked; if you reach for that pre-shredded pizza blend in the cheese aisle, you'll be doing yourself a huge disservice--go with the fresh, which may cost more, but the taste and texture far exceeds the bagged "cheese"). This was supposed to be a traditional pizza Margherita, usually a red-white-and-green pizza comprising pizza sauce, mozzarella and fresh basil, but I'm admittedly not the biggest fan of fresh basil. So I just sprinkled on some dried basil before popping the pizza into the oven on 450 degrees F and baking for 8 minutes.


The side was just a basic salad with chopped tomatoes, cucumbers, and carrots.

Now, for dessert....I really can't rave about this recipe enough. I'm a big, big fan of salty-but-sweet desserts, and this hits the spot every time. It's a Strawberry Pretzel Salad, and really, I just followed the linked recipe step-by-step. I did allow the pretzel crust (really the genius part of this recipe) to cool before topping with the cream cheese mixture. I let those two layers chill in the fridge for about 30 minutes to allow it to set, then I made the Jell-O mixture and popped it into the fridge for about 5-7 minutes just to get it set a bit before pouring on top of the cream cheese mixture. Within about 2 hours, the dessert had set enough to be consumed. Yeah, it all sounds very white trash-y (for some reason, Jell-O in a dessert seems to have that stigma), but I find it to be a...well, a delightful dessert.

Sunday, April 11, 2010

Pork Tacos with Radish-Avocado Salsa

I think one of the funnest dinners to cook is a Mexican-inspired dish. I love all of the individual pieces to it and serving up something of a food assembly line. This time around, I decided to try out a shredded pork entree for a change. Now, you can use the pork recipe from the following link, but I had the time to drop a pork tenderloin in a crock pot, so I went that route. I just picked up a 1.5 pound pork tenderloin, placed it in a crock pot with one cup of water, one chopped yellow onion, and four cloves of chopped garlic and let it go on low for about six hours. After six hours, I added one packet of taco seasoning to the crock pot and continued to cook on low for another hour. At this point, the pork should literally melt apart and will need little work to shred.


In the meantime, I used this recipe to make the radish-avocado salsa. I don't normally like radishes, but this was a refreshing take on the normal tomato-based salsa. It was equally great served with tortilla chips or as a topper for the pork tacos.


I pulled all of this together with warmed tortillas, chopped cherry tomatoes, lettuce, a habanero salsa (in addition to the radish-avocado salsa), and hot sauce. Sides included red rice and refried beans (I put most of the work into the homemade salsa and the entree rather than in the sides).